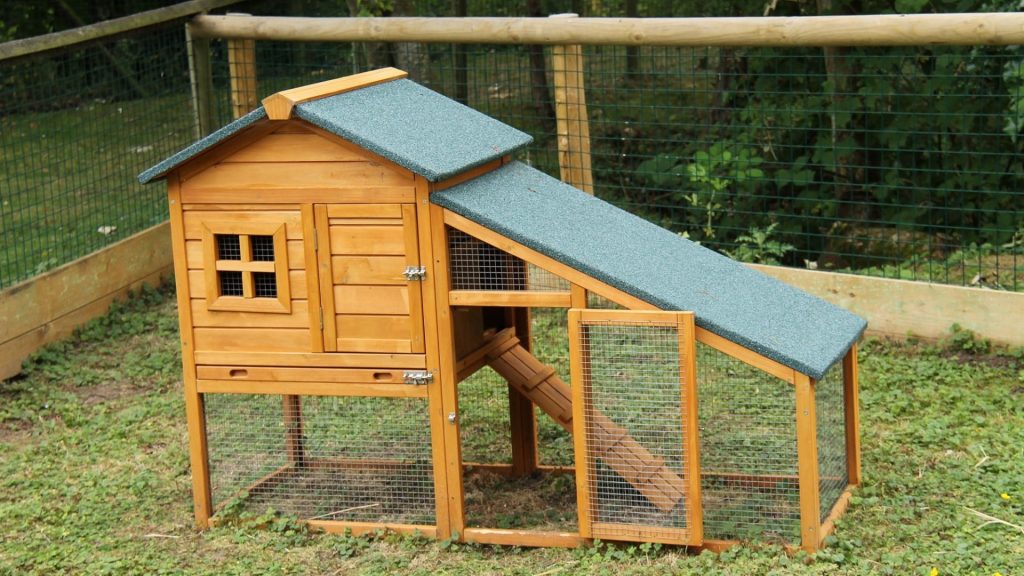
Every chicken coop owner wants to grow their backyard flocks. And they prefer the hatching chicken eggs fun project to expand their flocks. Eggs hatching requires 20 to 21 days, and also, for incubating the chicken eggs, you need the egg incubator. The incubator greatly helps to control humidity, temperature, and egg turning. The 21-day project is divided into several steps: Day 0 – setting the eggs. Day 1-18 – The set stage; Day 18-21 – lockdown and pre-hatching. And finally, day 21 is hatch day.
However, in this article, we will explain how to hatch chicken eggs perfectly and many more things. So, keep reading!
Making A Choice: Incubator Or Broody Hen For Chicken Egg Hatching
When it comes to chicken egg hatching, the two available options you have are:
- Chicken hatching with an egg incubator
- Let the broody hen do the hatching
Now while making a choice of which one is the best, you have to consider several options. After comparing the benefit and disadvantages of both methods, you can choose one that fits your need. Some of the advantages and disadvantages of these two methods are explained in the following table. Take a look at it:
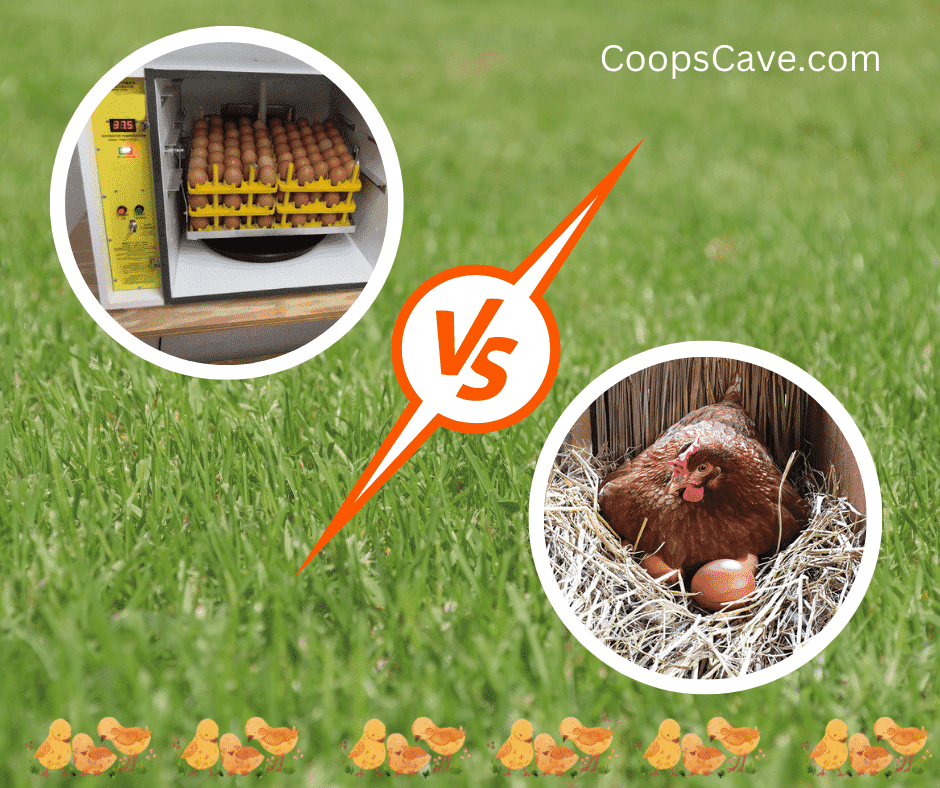
Incubator VS Broody Hen
|
Broody Hen |
Incubator |
||
|
Benefits |
Disadvantage |
Benefits |
Disadvantages |
|
Availability of eggs is easier |
The hen may not go broody |
Any time you can hatch with an incubator |
The flock owner have to work a lot while using the incubator |
|
Broody hen is always ready to hatch eggs |
There is no specific time for a broody hen |
The incubator are available in different sizes. You can hatch any number of eggs |
Constantly need to watch the humidity, and temperature until 21 days |
|
Reduce the incubator set up cost as the hen make her nest |
Hens can hatch limited number of eggs that fit under them |
Through the clear plastic lid the flock owner can see the little chicks |
The incubator and brooder box is expensive |
|
The hen constantly check and turn the egg by her own |
You need to provide the hen with a dry and clean area |
You can increase the hatching rate by controlling the humidity and temperature |
Power outages can destroy the eggs in incubator |
|
The hen teach her chicks how to drink and eat |
Hens can sometimes abandon their eggs |
Ensure the chick’s safety from predators |
You need to constantly turn the eggs many times in a day |
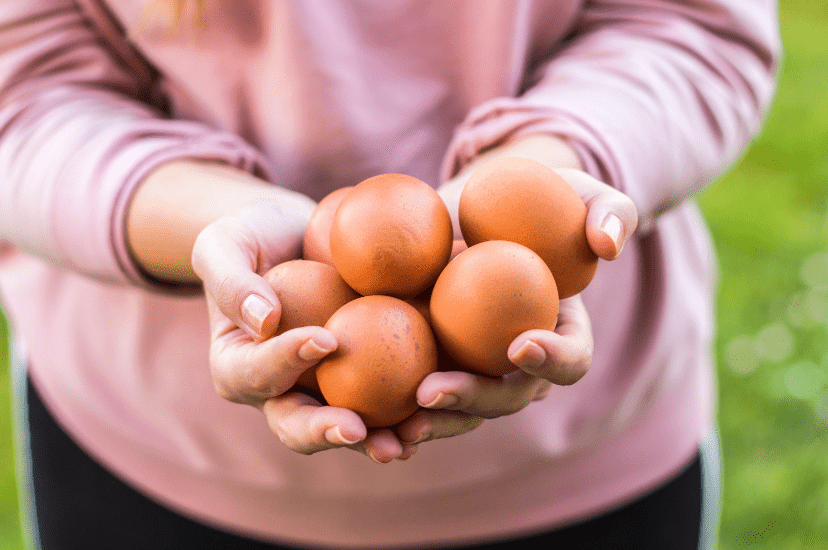
Find Fertile Eggs
Before incubating the chicken eggs, your first job is to get the fertile eggs. For hatching the chicks, of course, you will need eggs first. The normal eggs are not for hatching. Instead, only you can use the fertile eggs to hatch. Now you can find fertile eggs in the following two ways:
Get Fertile Eggs From Your Flock’s Rooster:
If the hens are housed with the rooster, you can collect their eggs.
Purchase Fertile Eggs:
The eggs you buy from grocery stores are not fertile, and baby chicks will not grow in them. Therefore, you can purchase fertile chicken eggs from poultry farmers or hatcheries. But before buying the eggs, make sure they have roosters in their flocks.
How To Set Up An Incubator
Using an egg incubator, you can hatch the fertile chicken eggs. An enclosed structure with a heater and fan is called the incubator. During the incubation period, the incubator keeps the eggs warm. Before purchasing an incubator, ensure it comes with some automatic features, and its fan facilitates even heat distribution.
Before the fertilized eggs arrive at least one week ago, prepare the incubator. Using the 10% bleach solution and soapy water, wash it. Rinse it properly, and ensure you start the hatching with a sanitized environment.
Once the incubator becomes dry and clean, check its constant temperature by turning it on. And also, make sure that the incubator maintains its humidity level. Then perfectly place the incubator at a steady temperature where there is no draft risk.
However, the humidity and temperature inside the incubator are the most crucial factors for successfully hatching the eggs. For setting up the incubator, the suggested temperature guidelines are as follows:
Temperature Range: 99-102 °F
1. Make sure the temperature is not dropping below 99 °F
2. If the temperature becomes 102 °F ensure it won’t last more than a few hours
3. With a medical thermometer, double-check the incubator’s thermometer and ensure the gauge’s proper functioning.
Optimum Temperature: 100.5 °F
Relative Humidity: 50-55 Percent (Day 1-17)
1. The temperature should be 85-87 °F, equivalent to the wet bulb temperature.
2. To facilitate proper humidity, keep the water channels full in the incubator.
Relative Humidity: (70% on day 18) (Day 18-21)
1. Throughout the incubation period, make sure the humidity levels are correct. And using a hydrometer ensures the perfect humidity level.
2. Open the incubator only when it’s necessary. Doing so will ensure the success of the hatch.
3. When the embryos grow bigger, we recommend you increase the ventilation, especially from day 18-21.
While hatching the chicken eggs, you must follow all the above recommendations.
Chicken Incubator Temperature Chart
The following temperature chart will help you decide how to use the incubator. So take a look at it:
|
Chicken Incubator Temperature Chart |
|||||
|
Incubation procedures: www.coopscave.com |
|||||
|
Day |
Hatching |
Humidity % |
Water |
Air |
Eggs |
|
1 |
99.5 |
57-60 |
If needed |
– |
No |
|
2 |
99.5 |
57-60 |
If needed |
– |
No |
|
3 |
99.5 |
57-60 |
If needed |
– |
Yes |
|
4 |
99.5 |
57-60 |
If needed |
– |
Yes |
|
5 |
99.5 |
57-60 |
If needed |
– |
Yes |
|
6 |
99.5 |
57-60 |
If needed |
– |
Yes |
|
7 |
99.5 |
57-60 |
If needed |
Control |
Yes |
|
8 |
99.5 |
57-60 |
If needed |
– |
Yes |
|
9 |
99.5 |
57-60 |
If needed |
– |
Yes |
|
10 |
99.5 |
57-60 |
If needed |
– |
Yes |
|
11 |
99.5 |
57-60 |
If needed |
– |
Yes |
|
12 |
99.5 |
57-60 |
If needed |
– |
Yes |
|
13 |
99.5 |
57-60 |
If needed |
– |
Yes |
|
14 |
99.5 |
57-60 |
If needed |
Control |
Yes |
|
15 |
99.5 |
57-60 |
If needed |
– |
Yes |
|
16 |
99.5 |
57-60 |
If needed |
– |
Yes |
|
17 |
99.5 |
57-60 |
If needed |
– |
Yes |
|
18 |
99.5 |
57-60 |
If needed |
– |
Yes |
|
19 |
99.5 |
65 + |
Full |
Control |
Yes |
|
20 |
99.5 |
65 + |
Full |
– |
No |
|
21 |
99.5 |
65 + |
Full |
– |
No |
6 Things You Need Before Hatching With An Incubator
Before hatching the eggs with an incubator, you require certain things to make the process successful. Those things are:
- Incubator (with turning rack)
- Thermometer
- Hygrometer
- Candling device
- Water
- Paper towels
First off, plug everything into the incubator. After that, ensure that both the turning tray and incubator are functioning perfectly. For a few hours, leave it in a plug-in situation and provide the proper humidity and temperature in it. Don’t waste time while you are waiting. In the meantime, you can read and understand all equipment’s instructions.
Usually, the built-in hygrometer and thermometer are available in the incubator. But still, for better results, you can double-check the incubator with another hygrometer or thermometer. Now fill the water chamber by putting water in it. Following the instruction, fill the water chambers. And to deal with the inevitable mess, use paper towels.
21-Day Guide To Hatching Chicken Eggs
The 21-day guide for hatching the chicken eggs is divided into several steps from day 0-to-day 21. At day 0, the first step is you need to set the eggs. Then on days 1-18, you have to set the stage, and then day 18-21 is the lockdown to the pre-hatching stage. We will explain the details of what you need to do in all these days. So, just go through the following description below:
Day 0: Setting Your Eggs
First, you must set your eggs to start the process. Allow your stored eggs to stay at warm room temperature for 4-8 hours. Before putting the eggs into the prepared incubator, you must do it. If you directly place the cold eggs in the humid and warm incubator, it can cause suffocation or contamination.
However, while setting the eggs, we recommend you at a time you should set at least six eggs. Putting too many eggs at a time will ensure that the flock will feel comfortable and happy together. Set the egg so that the large end of the egg faces upwards. And make sure the narrower side is facing downward.
A narrower side downward means the head of the chick will face toward the egg’s air cell. Moreover, positioning the egg at a slight angle doesn’t put it upright. We recommend you put the egg in a way that will remind you how eggs lay in the hen’s nest.
After putting the eggs inside the incubator, we recommend you use them for at least 4 hours. Don’t adjust the humidity or temperature. If any drastic changes occur, you can adjust the incubator temperature. Whatever necessary adjustments you want to make, you can do all these after 4 hours. So, this first step is the starting point of the 21-day incubation period. Therefore do it perfectly.
Day 1-18: The Set Stage
During the set stage, it’s crucial to turn the eggs as frequently as possible. The gold standard of turning the egg is once every hour. However, for getting success, the minimum requirement is at every 24 hours; you should turn the eggs at least five times.
Using a pencil, you can easily keep track of your rotated eggs. On one side of the eggs, you can gently mark X. Don’t use pens or sharpies to mark on the eggs. Through the egg shell, the ink can seep if you use sharp pens. Again, one important thing is before touching the eggs, you must wash your hands.
During the set stage, we recommend you monitor the humidity levels and temperature of the incubator. Try to keep the incubator closed most of the time. The humidity and temperature fluctuations significantly affect the hatch rates. Therefore keep the incubator closed as often as possible.
All the way from day 1 to day 18, you require to repeat this process. Day 10 is the only exception. On day 10, you can candle the eggs to check the chicks. Through candling, you can observe your new chick’s embryonic development. You can buy commercial candles or use a focused, small flashlight in a dark room to candle the eggs.
After about 8-12 days of incubation easily, you can confirm the chick’s embryo confirmation. You will see a living embryo on the egg’s wider end within this period. And faint blood vessels surrounded the dark spot. We recommend you allow the light to pass through the egg to compare the fertile and infertile eggs. If there are any infertile eggs, remove that one at this point from the fertile egg.
Day 18-21: Lock Down & Pre hatching
The lockdown period is the critical time for hatching the egg. And its duration is from Day 18-21. Within this period, the chicks prepare to hatch. However, you can ensure more growth of your chicks by doing several things. Like the following:
- Don’t turn the eggs, completely stop turning the eggs during this period. Leave the eggs alone with the egg’s wide end facing upwards.
- Reduce the temperature of your incubator by 1°F.
- And by 65-70%, increase the relative humidity of your incubator.
We recommend leaving your chicks alone at this stage as they move toward their final position. Also, don’t move or open the incubator lid.
Day 21: Hatch Day
Finally, day 21 is hatch day. At this point, you will hear the egg’s peeping coming from the egg inside. After the chicks pip the shell, you will soon experience that your eggs are rocking around. Once the hatching begins, be patient and allow your chicks to go through this process.
It happens that there are some partially dried blood vessels. Therefore, pulling the shell prematurely can lead to fatal bleeding. 5-7 hours will require for chicks to hatch fully. But sometimes exceptional can happens. And some chicks can take 24 hours to hatch fully.
However, the constant level increasing of humidity assures that the chicks will remain found. It also ensures a high hatching rate. Give some rest to your chicks after pecking their first hole. Before continuing, allow some time for your chicks to adjust their lungs. Your first few hatched chick peeping will encourage those who haven’t hatched yet.
Once you ensure that all the chicks are hatched, it’s time to increase the incubator’s ventilation. Wait for 24 hours so that the feathers of your chicks dry entirely. Your chicks can easily remain ok without drinking or eating from 24-72 hours. And within these 24 hours, the rest of the chicks will hatch quickly.
Open the incubator only when you are sure that all the newly hatched chicks are entirely fluffy and dry. Then move the chicks into a 90-95 degree Fahrenheit prepared border. And don’t forget to give your chick food and water. Now the chicks will spend their first few weeks in this condition.
What is Next? (Incubator To The Brooder)
The next step is moving the chicks from your incubator to the brooder. But before moving the chicks, ensure they are fully dry. And only then move them to their border. If you move the chicks prematurely, it can affect them adversely.
Before moving the chicks to the brooder, ensure they contain water and food and are pre-heated. Dip the chick’s beak into the water when you place the chick into the brooder. Doing so will help the chicks to know where to drink the water.
You should cover the brooder’s floor for the first few days with paper towels. Drop the feed on the brooder floor, so the feed-dropping sound encourages the chicks to start eating. Then allow your chicks to rest for some time. The chicks need some time to adjust to life outside their egg.
However, it’s also crucial that the chick gets accustomed to you, so you need to spend time with the flock. After a few days, use feeders for your chicks so that they get accustomed to it. And at this point, you can also use the pine shavings as their bedding instead of paper towels.
5 Tips For A Successful Hatch
For a successful hatch, you must follow several tips. Without following these tips, you may fail to hatch the eggs properly. The most enjoyable aspect of chicken breeding and keeping is hatching the eggs. Therefore do the hatching perfectly so that it becomes successful.
1. Hatch A Plan
To ensure the success of your hatch, you need to follow a step-by-step plan, whether you are a seasoned vet or hatching the eggs for the first time. You will remain on track by following the perfect plan. Moreover, your pre-prepared plan will help you to tackle the incubation process’s each crucial step.
2. Set Up The Incubator Properly
Before starting the hatching, you must ensure that you set up your incubator correctly. Make sure the incubator’s temperature holding capacity is at least 99.5°F. Maintaining this temperature level is crucial because one degree lower or higher temp than this can adversely affect the chicks. Moreover, temperature fluctuations can terminate the embryos of your chicken.
While setting the incubator, you must also test its relative humidity. The humidity should be around 55-60% until 18 days of the lockdown period. And at the final days of incubation, 65-70% should be the humidity level. You will be able to improve all the odds once you ensure that the incubator is working correctly.
3. Set Your Eggs Correctly
First, keep the eggs at room temperature so that they remain warm. Afterward, place the eggs inside your incubator. The warm temperature will ensure that they will not build up in the eggs after placing them inside the incubator. Also, ensure that your egg’s face is downward. At every 24 hours, you should turn the eggs at least five times until day 18th.
4. Keep Records
We recommend you keep a record of your step-by-step plan and place a score against the plan. Doing this will reduce the chance that you won’t miss any key steps of your plan. Tracking the following is crucial for you:
- Turning of egg
- The relative humidity level inside the incubator and
- The number of incubation days
5. Be Patient
The 21-day incubation period is not long, but you can become impatient when the hatching day comes on its way. We recommend you don’t be impatient and remain stuck to your plan. For hatching, naturally, allow the chicks some time. If you try to speed up the hatching process, it can cause more harm than good. So, wait until the hatching process is completed naturally.
How To Hatch An Egg Without An Incubator
Without an incubator, you can hatch the egg with the help of a broody hen. This process is also called hatching chicken eggs naturally. However, without an incubator for hatching eggs, you have to follow the steps below:
1. Identify A Broody Hen In Your Flock: Without an incubator, you require a broody hen to hatch the eggs. Therefore your first job is to identify the broody hen in your flock.
2. Separate The Broody Hen From The Flock: Once you successfully identify the flock’s broody hen, now it’s time to separate it from the entire flock.
3. Leave The Hen Alone: Leave the hen alone in a separate place so that it prepares for hatching the eggs.
4. Prepare For The Big Hatch: Make sure the broody hen is ready for big hatching.
5. Support The Mother Hen: For hatching the eggs, the broody hen may require 21 – 25 days. Within this hatching time you have to ensure the highest support for the mother hen.
6. Move Your Chicks: Once the hatching becomes successful and chicks become out of the egg shell, then move your chicks carefully from the mother hen.
Frequently Asked Questions
How long does it take for an egg to hatch?
Usually, an egg takes 20-21 days to hatch. That is, 20-21 is the chicken egg’s incubation period.
Do All The Eggs Hatch At Once?
No! Not all the eggs hatched at once. Some eggs may hatch earlier, and others may require more time.
What Temperature Should The Incubator Be Set To?
You should set the forced air incubator’s temperature to 99.5 to 100.5 degrees Fahrenheit. And 100.5-101.5 degree temperature is the standard temp of a still air incubator. The incubator’s humidity level should be at least 60%.
How Long Does It Take to Hatch a Chicken Egg Without an Incubator?
Without an incubator hatching the eggs by the hen can take 25 days or more. Naturally, hatching the eggs require more time than hatching the egg in the incubator.
What if none of the eggs have started to hatch at 21 days?
If no eggs have started to hatch even on day 21, don’t despair. Instead, give the egg some time until Day 23. Before discarding the unhatched eggs, candle them to see if they are still alive.
Final Thoughts
So, hopefully, after going through the above article, you now know the entire process of hatching chicken eggs. Once you decide to hatch the eggs in the incubator, then you need to set up the incubator with the correct humidity and heating temperature. After setting the eggs inside at the proper temperature, the hatching process begins.
Inside the incubator, carefully lay the eggs so that the hatching process becomes successful. Per day at least five times, turn the eggs. And inspect the eggs for breaks, cracks, or fissures. If you find any rotten eggs, remove them immediately. Regularly check the humidity and temperature in the incubator inside. Following all these steps carefully, along with our guide, will help you to complete the hatching process successfully.
You can comment in the comment section if you have any other queries on the hatching process. Soon we will reply to you.
Raising Chickens 101: A Beginner’s Guide
Get started in chicken raising with our expert-approved guide. From building a coop to hatching eggs, you’ll learn all the essential information you need to know. Topics include selecting breeds, caring for chicks, increasing egg production, and more. We also cover chicken feeds, behavior, disease prevention, and essential vitamins and minerals. Follow this guide for a successful and fulfilling experience.
Want to learn more about chicken raising? Check out our beginner’s guide below for even more tips and information:
- Building a Chicken Coop
- Selecting the Right Backyard Chicken Breeds
- Raising Baby Chicks
- Caring for Pullets
- Increasing Egg Production
- Types of Chicken Feeds
- Choosing the Best Chicken Feed
- Understanding Chicken Behavior
- Recognizing and Treating Chicken Diseases
- Providing Essential Vitamins and Minerals